> ## Documentation Index
> Fetch the complete documentation index at: https://docs.decodahealth.com/llms.txt
> Use this file to discover all available pages before exploring further.
# Ingenico Lane/7000
> Setup guide for the Ingenico Lane/7000 payment terminal.
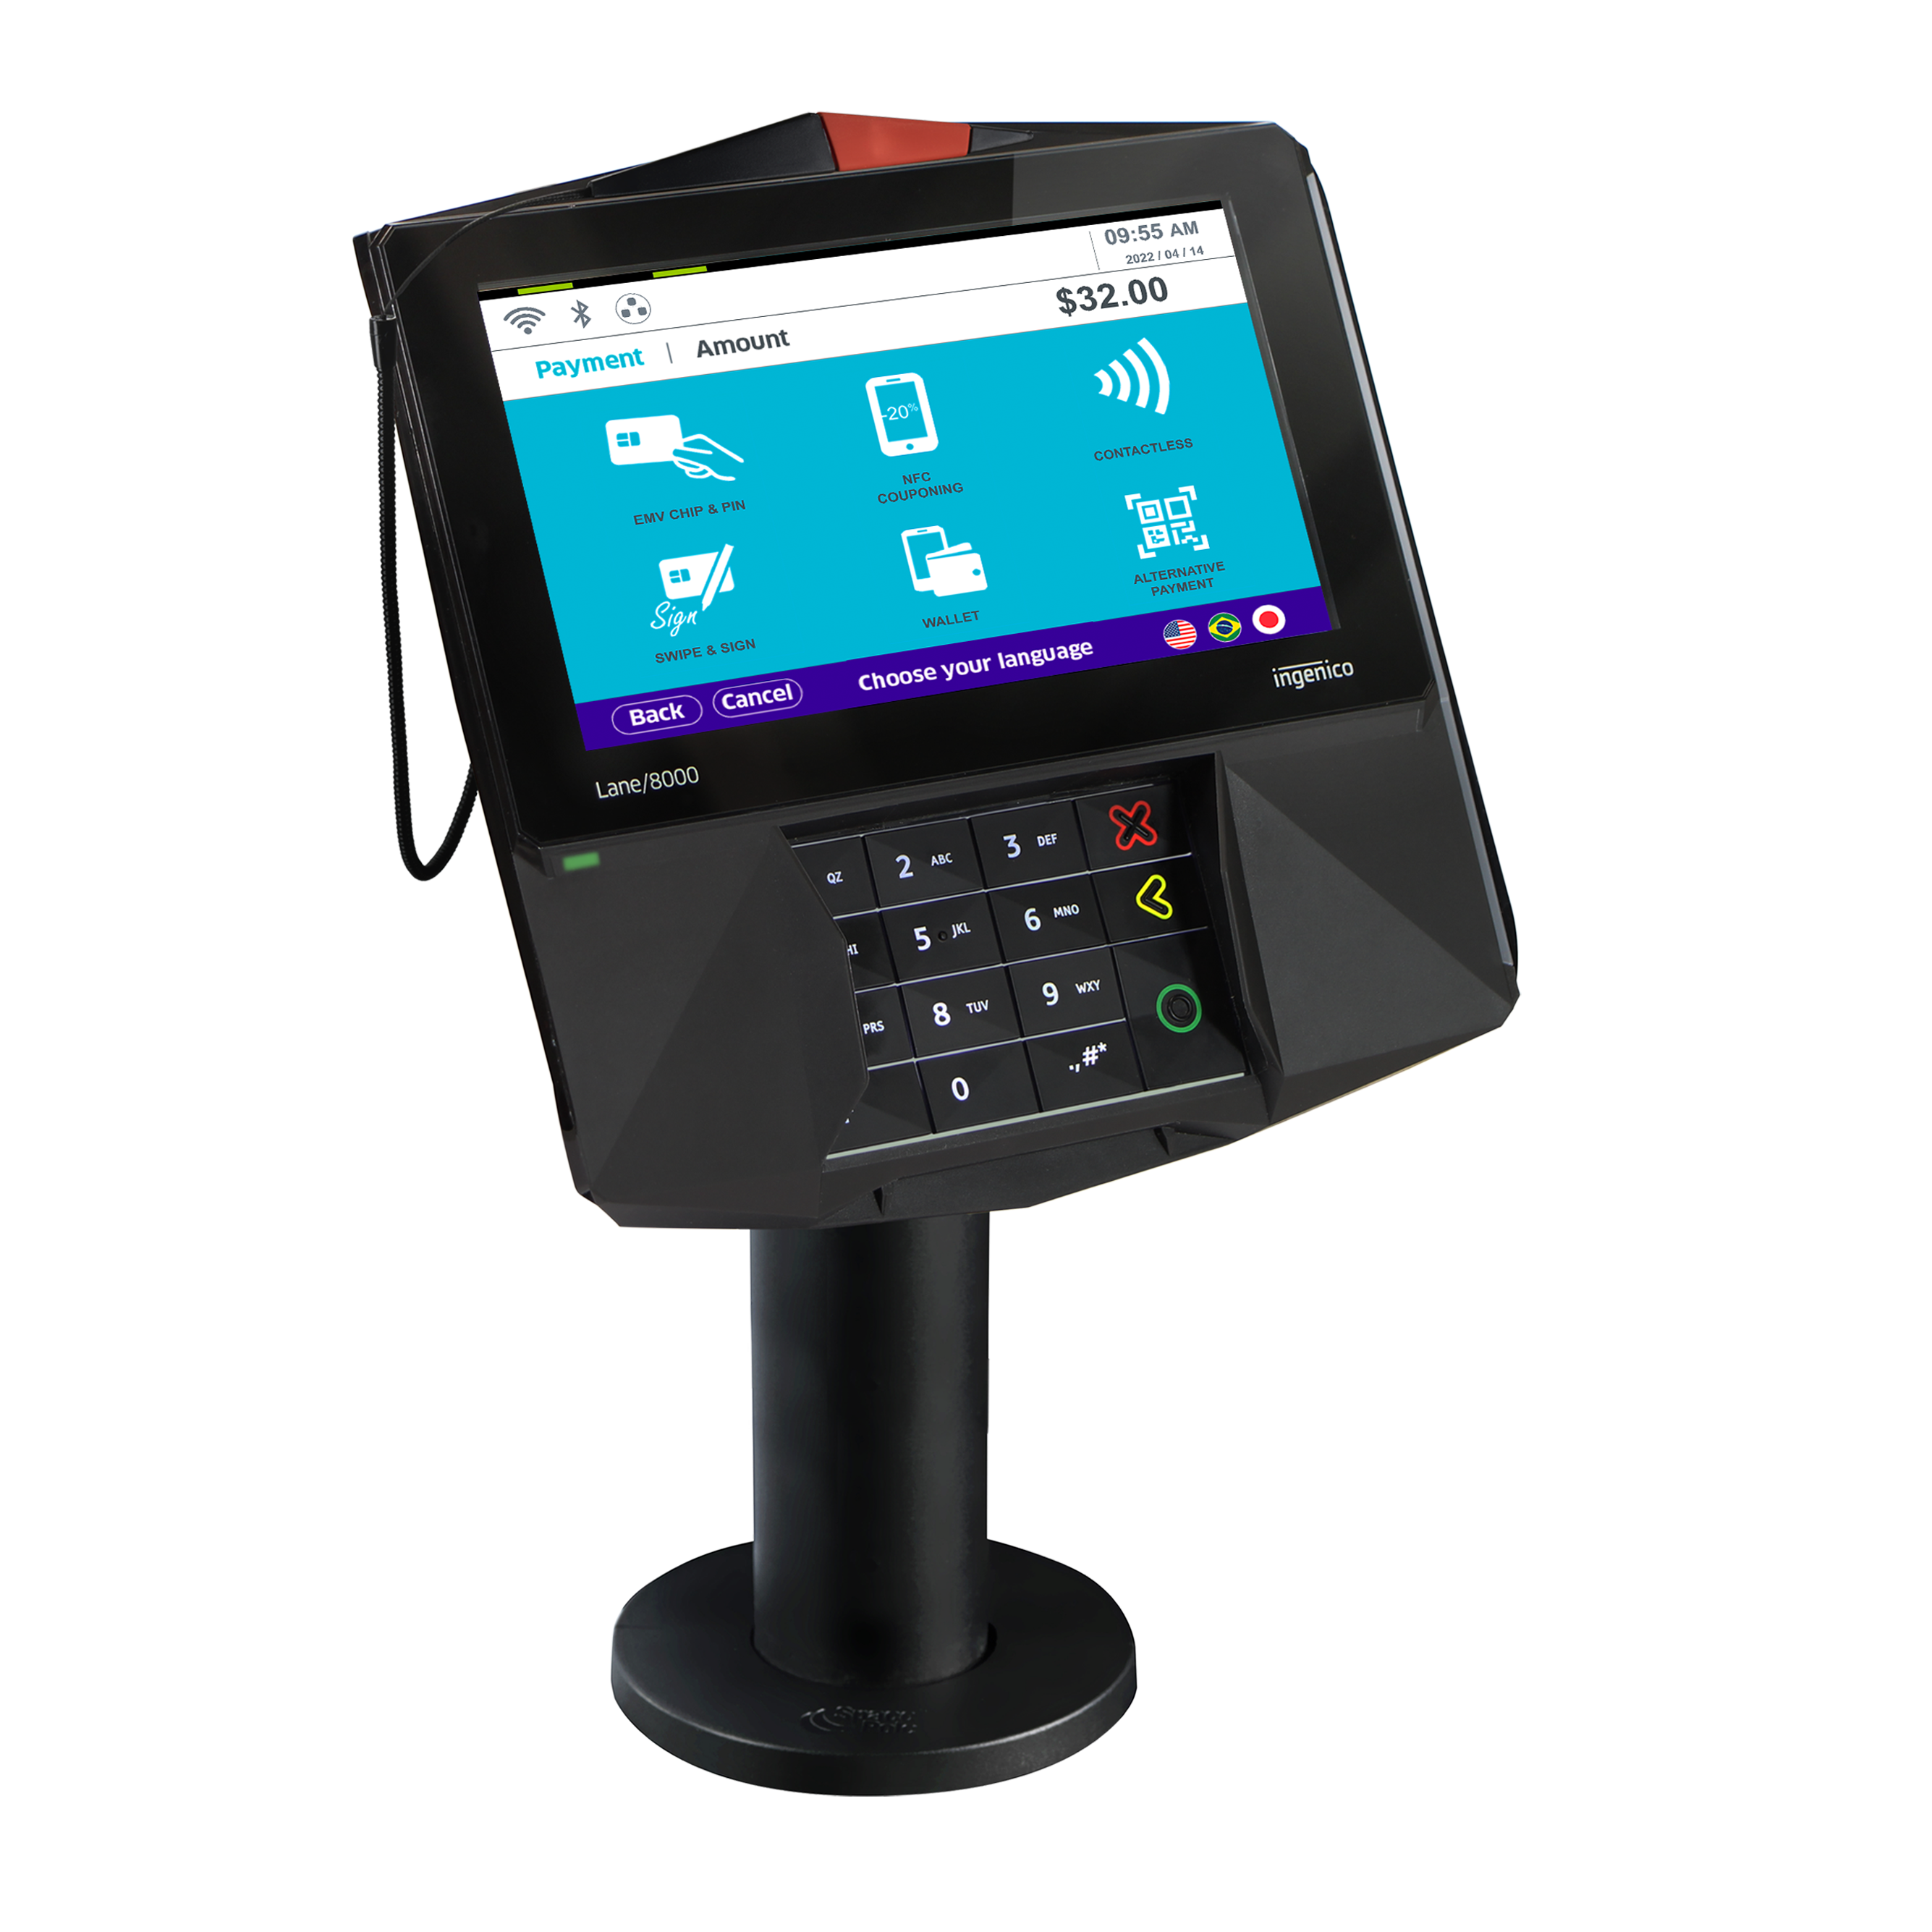 ## What's in the Box
* Ingenico Lane/7000 terminal
* Ingenico Multipoint Interface Cable
* Ingenico power supply
* Ingenico Stylus
## Initial Setup
* Plug the power supply connector into the jack on the Multipoint Interface Cable.
* Connect the Multipoint Interface Cable into the Multipoint Port on the underside of the terminal.
* Plug the power supply adapter into an available power outlet.
Connect the other end of the Multipoint Interface Cable to an Ethernet port (router, modem, wall jack, etc.).
Attach the stylus to your device using the provided two-sided tape.
## Connecting to Wi-Fi
On the pin-pad, press `2634` (the screen will change. If it does not, retry until you see the new screen).
Press the `F` key (located below the number 7).
Use your finger or the included stylus for input on the screen.
Navigate to **Tetra Admin > 5-Configure Wi-Fi > 2-Scan Networks**.
Select your wireless network after the scan is complete.
Enter the password using the alphanumeric keypad or touch screen. The keypad uses T9 entry. Pressing each key more than once cycles from numbers to lower case letters to upper case letters.
Press the green circle/enter key to complete the setup.
Confirm the connection by pressing the green button again on the pin-pad.
Press the red `X` 4–5 times to return to the home screen.
## Powering On and Registering the Terminal
Once power is supplied, the initialization process begins.
After establishing its IP address, the terminal starts the registration process.
The terminal will display a 6-digit alphanumeric code. Use this code when [registering the device](/modules/settings/payment-management#register-a-new-device) in Decoda.
## Entering Text Using the Multi-Tap Method
Each number key represents a set of letters. Pressing the key multiple times will cycle through the numbers and letters. For example, pressing `2`:
| Presses | Character |
| ------- | --------- |
| 1 | `2` |
| 2 | `a` |
| 3 | `b` |
| 4 | `c` |
| 5 | `A` |
| 6 | `B` |
| 7 | `C` |
## Troubleshooting
### Restart Your Terminal
There are two ways to restart your terminal:
**Soft Reboot:** Access the Admin Menu and select the Restart Terminal option.
**Hard Reboot:** Press and hold the `.`, `#`, `*` key and `<` (yellow key) simultaneously until the device powers off.
### Device Disconnected
If your device becomes disconnected, verify the following:
* Ensure you are using the provided multi-point mono connector (Ethernet) cable and power supply.
* Check that the Ethernet jack on the multi-point mono connector cable is securely plugged into your router, modem, networking switch, or Ethernet wall jack.
* Verify that the Ethernet port being used has access to the Internet and that your internal network allows Integrated Terminal connections.
### Command Cancelled Error
Check that the stylus is securely connected to the terminal. Without a connected stylus, the terminal aborts the signature process with a "Command Cancelled" error.
## What's in the Box
* Ingenico Lane/7000 terminal
* Ingenico Multipoint Interface Cable
* Ingenico power supply
* Ingenico Stylus
## Initial Setup
* Plug the power supply connector into the jack on the Multipoint Interface Cable.
* Connect the Multipoint Interface Cable into the Multipoint Port on the underside of the terminal.
* Plug the power supply adapter into an available power outlet.
Connect the other end of the Multipoint Interface Cable to an Ethernet port (router, modem, wall jack, etc.).
Attach the stylus to your device using the provided two-sided tape.
## Connecting to Wi-Fi
On the pin-pad, press `2634` (the screen will change. If it does not, retry until you see the new screen).
Press the `F` key (located below the number 7).
Use your finger or the included stylus for input on the screen.
Navigate to **Tetra Admin > 5-Configure Wi-Fi > 2-Scan Networks**.
Select your wireless network after the scan is complete.
Enter the password using the alphanumeric keypad or touch screen. The keypad uses T9 entry. Pressing each key more than once cycles from numbers to lower case letters to upper case letters.
Press the green circle/enter key to complete the setup.
Confirm the connection by pressing the green button again on the pin-pad.
Press the red `X` 4–5 times to return to the home screen.
## Powering On and Registering the Terminal
Once power is supplied, the initialization process begins.
After establishing its IP address, the terminal starts the registration process.
The terminal will display a 6-digit alphanumeric code. Use this code when [registering the device](/modules/settings/payment-management#register-a-new-device) in Decoda.
## Entering Text Using the Multi-Tap Method
Each number key represents a set of letters. Pressing the key multiple times will cycle through the numbers and letters. For example, pressing `2`:
| Presses | Character |
| ------- | --------- |
| 1 | `2` |
| 2 | `a` |
| 3 | `b` |
| 4 | `c` |
| 5 | `A` |
| 6 | `B` |
| 7 | `C` |
## Troubleshooting
### Restart Your Terminal
There are two ways to restart your terminal:
**Soft Reboot:** Access the Admin Menu and select the Restart Terminal option.
**Hard Reboot:** Press and hold the `.`, `#`, `*` key and `<` (yellow key) simultaneously until the device powers off.
### Device Disconnected
If your device becomes disconnected, verify the following:
* Ensure you are using the provided multi-point mono connector (Ethernet) cable and power supply.
* Check that the Ethernet jack on the multi-point mono connector cable is securely plugged into your router, modem, networking switch, or Ethernet wall jack.
* Verify that the Ethernet port being used has access to the Internet and that your internal network allows Integrated Terminal connections.
### Command Cancelled Error
Check that the stylus is securely connected to the terminal. Without a connected stylus, the terminal aborts the signature process with a "Command Cancelled" error.