

Labs Guide
Decoda integrates with Junction to let providers order tests from Quest and Labcorp directly from a patient’s chart. Results come back into Decoda automatically, so there’s no separate system to check.Junction handles the actual lab connections, account provisioning, and test catalog. This guide covers the Decoda side: getting your Junction lab accounts set up and using lab ordering day-to-day.
Getting Access
To get started with lab ordering:- Email Decoda support at support@decodahealth.com to request a Junction team for your clinic.
- Decoda will invite you to Junction. Open the invite email and join.
-
In Junction, switch to the Production environment, open Team Config > Lab Accounts, and click Request account interface to request your Quest and/or Labcorp accounts.
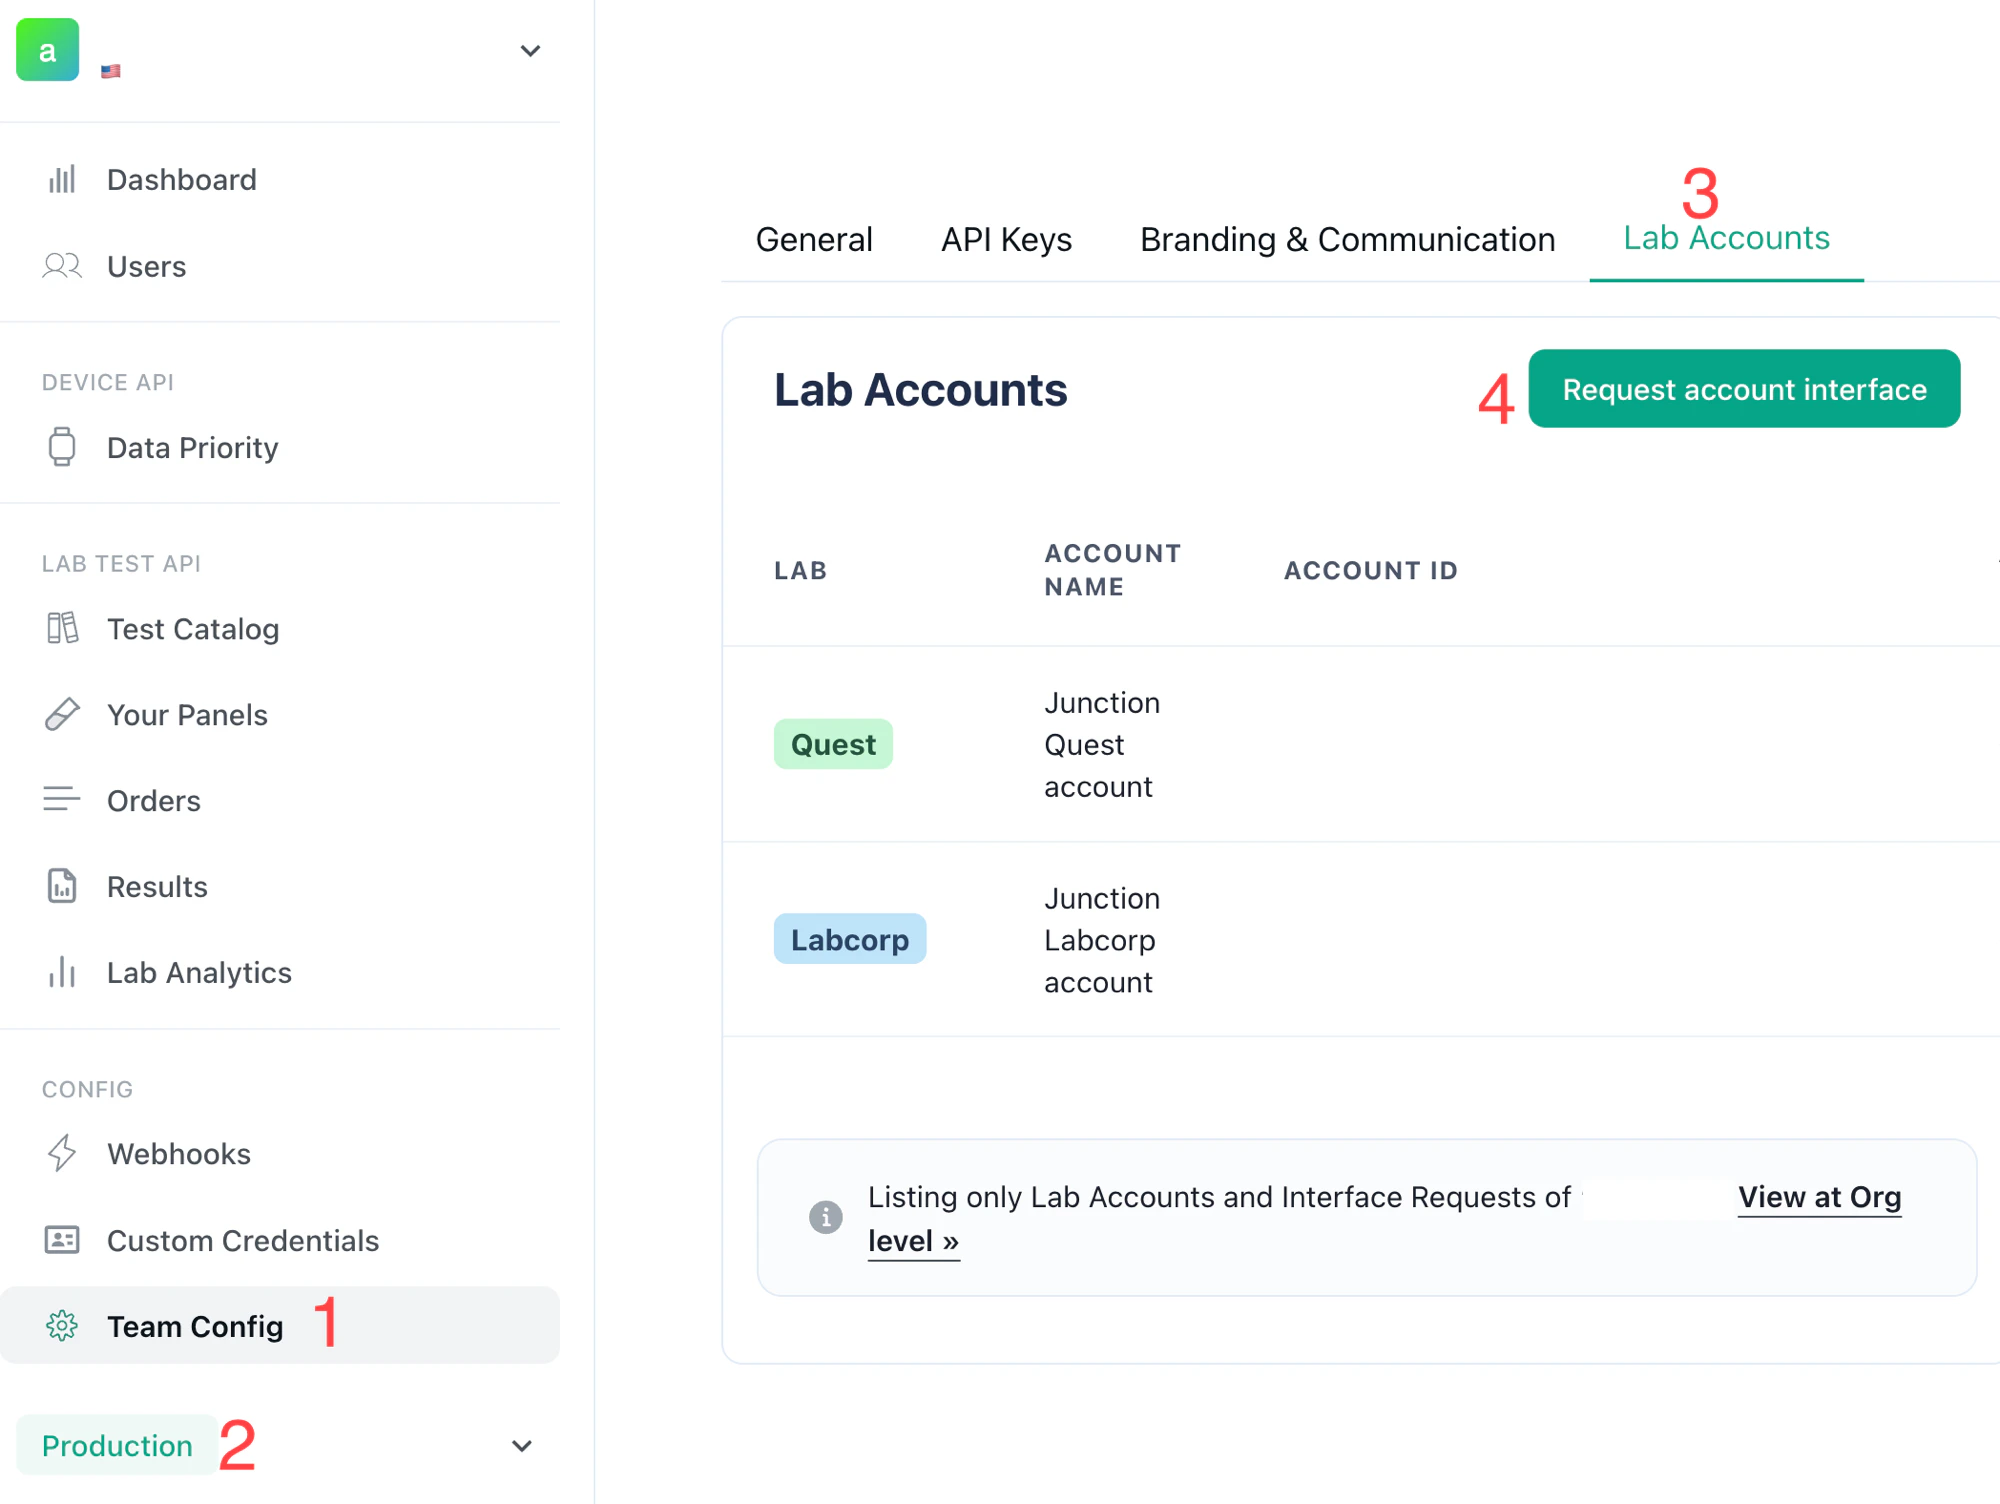
Requesting a Junction account interface
-
For Labcorp accounts only: contact your Labcorp rep to start the EDI interface request. Junction can kick off Quest integrations on its own; Labcorp requires you to initiate it on their side. Use this template:
Hello [Labcorp contact name], We at [account name] are reaching out on behalf of our integration with Adept Labs. We would like to request an EDI interface for [account number] with connection to the Adept Labs Interface account. Please reach out to the Adept Labs team at lab_interfaces@junction.com to coordinate the necessary integration actions. Thank you, [account name]
Placing a Lab Order
Open the patient and go to the Labs tab. Click New lab order to open the ordering drawer. The drawer has three steps, shown as a breadcrumb at the top: Tests, Details, Review.- Tests — pick which lab’s catalog to browse, then search panels or individual markers. Selected items land in the Order summary on the right. If the cart mixes tests from more than one lab, each lab is placed as a separate order.
- Details — set the collection method (walk-in, at-home phlebotomy, test kit, or on-site collection), then fill in the clinical details: diagnosis codes (ICD-10), billing type, priority, ordering physician, and any notes for the lab. If a lab has more than one billing account, a Lab account picker appears here so you can choose which one the order bills to. ICD-10 codes are required for Commercial Insurance and Patient Bill orders. Client Bill orders don’t need them. Patient Bill (Passthrough) orders can’t use them at all — the lab rejects passthrough orders that carry diagnosis codes — so the field is hidden for that billing type, and any codes you already added stay on your record but aren’t sent to the lab.
- Review — confirm patient details and the full order summary. Click the primary action to place the order.
The ordering physician needs an NPI on file to order under My provider. Pick Junction physician network if the physician doesn’t have one — the lab assigns a signing physician for you.
Viewing an Order
From the patient’s Labs tab, click any order in the list to open the detail view. The detail page has two tabs: Order Details — shows the order timeline (status updates from the lab), lab and test information (laboratory name, address, tests ordered, sample type, fasting requirement, collection method), and order information (physician, billing type, ICD-10 codes, priority, clinical notes, dates). Results — appears once the lab returns results. Shows:- AI Summary — an AI-generated overview at the top that highlights abnormal or critical values and explains their clinical significance. Click Regenerate to get a fresh summary.
- Biomarker Table — each result row shows the marker name, value, unit, reference range, status (normal, abnormal, or critical), and any notes from the lab. Abnormal and critical values are highlighted in red.
Order Actions
- Refresh — pull the latest status from the lab.
- Requisition — download the requisition form (available once the lab confirms the order).
- Results PDF — download the full results report (available once results are ready).
- Cancel Order — cancel an order that has not yet been processed by the lab.